
Configuring Ddev alongside and existing Lando Drupal project
This guide explores the pathway to embracing DDEV, for those familiar with Lando thereby elevating your development environment. This walk through is presented from the perspective of working on a Manjaro Linux system but the same principles apply to any host operating system.
Why choose DDEV?
This transition is largely due to DDEV's emerging role as a standard within the Drupal community, reflecting a trend towards adopting tools that facilitate a modern, streamlined development workflow.
The decision to bring DDEV alongside Lando is also about fostering an inclusive development environment that accommodates the diverse preferences and expertise within our team and the wider community. By maintaining dual support for both Lando and DDEV, contributors are offered the flexibility to work within their preferred tool set, easing transitions and encouraging broader collaboration.
Prerequisites
Before we dive into integrating DDEV with our Lando-configured Drupal project, there are several key requirements to ensure a smooth setup process.
- Operating System: A Manjaro Linux system, updated to the latest stable release. This guide is tailored for Manjaro, but the general principles may apply to other host operating systems with minor adjustments.
- Existing Drupal Project: An existing Drupal project already configured and running with Lando. This guide assumes familiarity with Lando and basic Drupal setup procedures. This guide is built on an unmodified installation of Drupal core.
- Lando: Ensure you have Lando installed and working. This guide does not cover the initial setup of Lando, so your project should already be capable of running within a Lando environment.
- Docker: Both Lando and DDEV rely on Docker, so you should have Docker installed and properly configured on your system. Verify that Docker can run containers without sudo privileges for a smoother experience.
- Command-Line Skills: Basic proficiency with command-line operations is crucial for executing the necessary commands for setting up and managing the development environments.
- Docker Familiarity: While an in-depth understanding of Docker is not required, thanks to DDEV and Lando's ability to abstract much of the complexity, a basic awareness of Docker's role in creating consistent development environments can be beneficial.
- Drupal Architecture: A good grasp of Drupal's architectural requirements is important, particularly regarding
settings.phpconfigurations, to effectively manage and customize your project's development setup.
Once you have verified these prerequisites, you're ready to start the process of integrating DDEV into your Drupal development workflow.
Installing DDEV
Let's start with the initial step of installing DDEV if it's not already part of your toolkit. Throughout this process, care is taken to preserve the integrity of Lando's configurations, including the .lando.yml and settings.php files, ensuring a stable coexistence between both environments.
For those setting off on this journey, a good starting point is the DDEV installation documentation available at: https://ddev.readthedocs.io/en/latest/users/install/ddev-installation/#linux
To install DDEV on Manjaro, we use the command the following command. For other operating systems this process may differ, please refer to DDEV's installing instructions for you operating system.
$ yay -S ddev-binThis command retrieves and installs the latest version of DDEV suitable for our environment. Expect to see confirmations for:
- Package installation requests
- Dependency checks and installations
- Download progress and completion statuses
...
==> Making package: ddev-bin 1.22.7-1 (Wed 13 Mar 2024 11:23:46)
...
==> Checking for packaging issues...
==> Creating package "ddev-bin"...
...
==> Finished making: ddev-bin 1.22.7-1 (Wed 13 Mar 2024 11:30:42)
Output truncated for brevity. Key installation steps and confirmations are shown.
Setting Up Your Project for Dual DDEV and Lando Support
Before you start integrating DDEV with your existing Lando-configured project, it's a good idea to familiarise yourself with DDEV's basic concepts. I recommend starting with the "Starting a Project" guide available at DDEV's documentation.
For a quick overview tailored to Drupal, the Drupal Quickstart on DDEV's documentation is an excellent resource.
Adapting the Quickstart for an Existing Project
Although the DDEV Quickstart guide provides a fresh setup route, my project is already equipped with a .lando.yml, a Drupal code base installed using composer create drupal/recommended-project and utilizes www as the document root. The DDEV Quickstart suggests initializing a new Drupal project with the following commands:
mkdir my-drupal10-site
cd my-drupal10-site
ddev config --project-type=drupal10 --docroot=web
ddev start
ddev composer create drupal/recommended-project
ddev composer require drush/drush
ddev drush site:install --account-name=admin --account-pass=admin -y
# use the one-time link (CTRL/CMD + Click) from the command below to edit your admin account details.
ddev drush uli
ddev launch
Our situation of configuring DDEV alongside and existing Lando configuration means adapting these instructions to fit an already established project.
Jumping into DDEV Configuration
With the goal to swiftly transition to DDEV, I'll focus on the configuration aspect, bypassing initial setup steps that don't apply to an already developed site.
Configuring DDEV for your Drupal project:
$ ddev config --project-type=drupal10 --docroot=webExecuting this command configures DDEV for Drupal 10, setting web as the document root and initiating the creation of the necessary DDEV configuration files in your project directory. As the time of this writing, DDEV does not explicit support Drupal 11, it does work however but dedicated support is coming soon.
Output (summarised for clarity):
Creating a new DDEV project config in the current directory (...)
                    Configuring a 'drupal10' project with docroot 'web' at ...
                    Configuration complete. You may now run 'ddev start'.
Modifying settings.php for DDEV
Let's dive into some practical aspects of DDEV configuration, specifically how it interacts with Drupal's settings.php:
ddev configdetects any existingsettings.phpfiles and introduces a mechanism to seamlessly integrate them with DDEV's environment without altering your primary configuration.- The conditional addition of
settings.ddev.phpby DDEV ensures Drupal connects to the correct database when running within the DDEV environment, leaving other environments (like Lando) unaffected. - Environment variables, such as
IS_DDEV_PROJECT, play a crucial role in this process, indicating when to apply DDEV-specific configurations.
Here’s a closer look at the mechanism in action:
// Automatically generated include for settings managed by ddev.
$ddev_settings = dirname(__FILE__) . '/settings.ddev.php';
if (getenv('IS_DDEV_PROJECT') == 'true' && is_readable($ddev_settings)) {
  require $ddev_settings;
}
This auto-generated snippet is appended to settings.php and the creation of settings.ddev.php allow for an efficient switch between DDEV and other environments, such as Lando, without manual intervention. In the case that settings.php and/or settings.ddev.php do not pre-exist DDEV will create them for you.
Interestingly, if settings.php or settings.ddev.php are deleted, DDEV automatically reinstates them with appropriate configurations upon starting. This ensures a resilient setup process, but also raises questions about the visibility and control developers have over these automated actions.
For a deeper discussion on these automated configurations and my perspective on developer control within DDEV, see my detailed post Exploring DDEV's Automation and Developer Autonomy.
Starting the Project with DDEV:
With DDEV configured, start the project:
$ ddev startThis command boots up your DDEV environment. Expect to see progress on the creation of Docker containers and network configurations necessary for your Drupal site to run locally.
Output (summarized for clarity):
Starting core-drupal...
                    Network ddev-core-drupal_default created
                    ...
                    mkcert may not be properly installed, we suggest installing it for trusted https support, `brew install mkcert nss`, `choco install -y mkcert`, etc. and then `mkcert -install`
                    ...
                    Waiting for additional project containers to become ready...
                    All project containers are now ready.
                    Successfully started core-drupal
                    Project can be reached at http://core-drupal.ddev.site http://127.0.0.1:32769
Note: The actual output has been trimmed for brevity. Essential actions and confirmations are highlighted to give you an idea of the process and what to look out for.
During your setup of DDEV, you may as I did, encounter a message regarding mkcert not being properly installed.
mkcert may not be properly installed, we suggest installing it for trusted https support, `brew install mkcert nss`, `choco install -y mkcert`, etc. and then `mkcert -install`According to the DDEV installation guide, this notice pertains to setting up mkcert for a trusted HTTPS experience in local development. This led me to make a deliberate choice regarding my local development environment: Instead of following this suggestion, I opted to continue without installing mkcert, accepting HTTP for my setup. This decision was based on a preference to avoid adding another layer of complexity to my environment.
As someone well-versed in using Lando for local development, I've grown accustomed to its approach to HTTPS. Lando automatically sets up an HTTPS service, untrusted by default, prompting a browser warning that I can choose to bypass. This setup has become a familiar part of my workflow, offering a balance between security protocols and development convenience. I was surprised to find that DDEV, in contrast, opts to remove this decision-making process from the developer. By requiring mkcert for a trusted HTTPS setup, DDEV aims for a seamless, warning-free browsing experience right out of the box. While the intent is to simplify development workflows, it restricts my choice to go ahead with an untrusted HTTPS setup, and introduces a deviation from what I've come to expect, emphasizing the importance of understanding the nuances of each tool in our development arsenal.
Note: I've shared more thoughts on this decision and its implications in a separate post, highlighting the importance of developer autonomy and tool transparency. You can read about it here.
Installing Drush with DDEV
Because my existing project does not have Drush installed I do need to run ddev composer require drush/drush
Installing Drush with Composer:
To add Drush to your project, execute:
$ ddev composer require drush/drushThis command utilizes Composer within the DDEV environment to install Drush, a command-line shell and scripting interface for Drupal. Composer will manage the installation, ensuring Drush is added as a dependency to your project.
Output (summarized for clarity):
Using version ^10.0 for drush/drush
                    ./composer.json has been updated
                    Running composer update drush/drush
                    Downloading drush/drush (10.x.x)
                    ...
                    Installation successful. Drush can now be used within your DDEV project.
Note: The output has been trimmed to highlight the start of the process and its completion.
Customizing the Project Setup
After ensuring Drush is installed with the command ddev composer require drush/drush, let's address a common step you might encounter in setting up a Drupal project from scratch with DDEV.
Skipping Standard Project Creation
In many guides, including DDEV's own documentation, you'll find the suggestion to initiate a new Drupal project with:
ddev composer create drupal/recommended-projectHowever, for our situation, this step is unnecessary as the Drupal setup is already in line with the structure drupal/recommended-project creates. This might be the case for you if your project is an existing one or if it was initially set up with these or similar parameters.
Transitioning to Drupal Installation
With Drush installed and the understanding that the typical ddev composer create step is not required for our scenario, our DDEV environment is up and ready. Let's confirm the site's availability and proceed with the Drupal installation process.
Ensuring Site Availability and Access
Upon starting DDEV with ddev start, the feedback indicated that my project was successfully launched:
Successfully started core-drupal
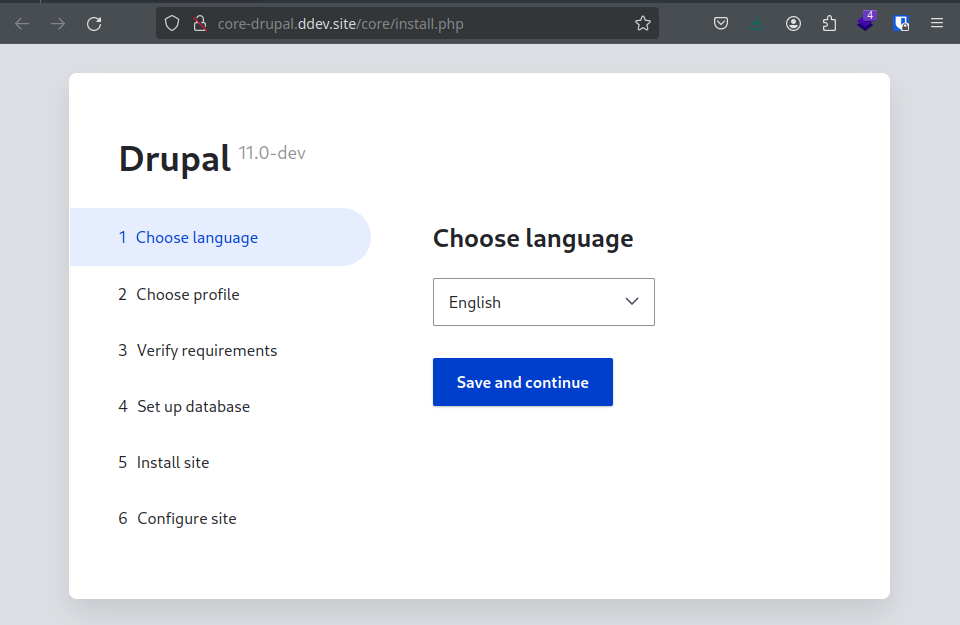
Project can be reached at http://core-drupal.ddev.site http://127.0.0.1:32769Visiting http://core-drupal.ddev.site confirms the site's accessibility, presenting Drupal's installation page. This step is handy for verifying the site's functionality before proceeding with command-line installation steps.
Now, with the groundwork laid out and preliminary checks completed, we move forward to installing Drupal via the command line with Drush.
Performing a Drupal Install with DDEV
Let's head back to our command line and run the Drupal install command:
ddev drush site:install --account-name=admin --account-pass=admin -y--account-name=admin: This option specifies the username for the main administrator account created during installation. In this case, the username will be "admin".--account-pass=admin: This option sets the password for the administrator account specified by--account-name. Here, the password is set to "admin".-y: This option automatically answers "yes" to any prompts that Drush might present during the operation, effectively running the command in a non-interactive mode.
 You are about to:
 * DROP all tables in your 'db' database.
 // Do you want to continue?: yes.
 ...
 [success] Installation complete.
Launching Your Project with DDEV
With the installation complete, we have a couple of options to access our new Drupal site. One method is to generate a one-time login link using Drush's drush uli command. Alternatively, you can directly navigate to the Drupal login page and use the admin username and password set during the installation process.
ddev drush uli
http://core-drupal.ddev.site/user/reset/1/1710310897/mLHP4_ziNDhJQAB0G8wwa6d4_9yxOD0Jh0NDcNYsbbM/login
And with that, we've successfully integrated DDEV into our existing project already configured with Lando.
Managing Lando and DDEV Environments
An important consideration when working with both Lando and DDEV is that you cannot run these environments concurrently for the same project. Attempting to start Lando with lando start while DDEV is active will lead to port binding issues, for example both projects can't listen on port 80 or 443 at the same time, and the same applies in reverse. To switch between environments smoothly, ensure to halt the currently running environment using ddev stop before starting Lando, and similarly, stop Lando with lando stop before firing up DDEV.
Troubleshooting Common Issues
Sometimes, even after running ddev stop or lando stop Running into port allocation errors is a common hiccup when switching between Lando and DDEV. Here's what you might encounter:
- Starting Lando when DDEV is active: You'll face an error related to port binding conflicts, specifically for port 443. The message will resemble:
Error response from daemon: driver failed programming external connectivity on endpoint landoproxyhyperion5000gandalfedition_proxy_1: Bind for 127.0.0.1:443 failed: port is already allocated- Starting DDEV when Lando is active: Similarly, DDEV will alert you about port 443 being in use, preventing it from starting:
Failed to start core-drupal: unable to listen on required ports, port 443 is already in use,
Troubleshooting suggestions at https://ddev.readthedocs.io/en/stable/users/basics/troubleshooting/#unable-listen
In both cases, the solution involves aggressively stopping the conflicting environment. Use lando poweroff to completely shut down any Lando services, and ddev poweroff to do the same for DDEV. These commands help release any bound ports, clearing the way for a smooth start of the other environment.
Conclusion
By extending our Drupal project to support both Lando and DDEV, we unlock a new level of flexibility in our development workflow. This dual-environment setup not only accommodates personal preference and project requirements but also fosters a more adaptable and resilient development practice. The journey from Lando-exclusive to dual support with DDEV on Manjaro Linux illustrates a proactive approach to development environment management, empowering developers with choice and versatility.
